Showing posts with label history. Show all posts

Friday, October 17, 2014

An alternative to narration

Narration is a very useful tool when it comes to reinforcing and understanding certain ideas with younger children. It basically consists of the retelling of a text by the younger child. It helps them organize ideas, grasp the gist, and differentiate between important facts and anecdotes.

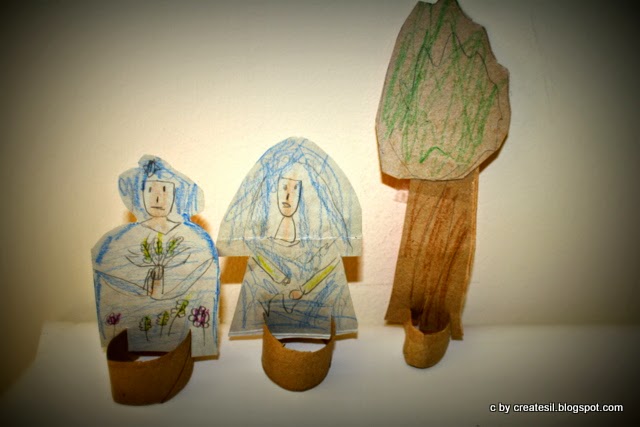
But it can get a bit repetitive and yes, boring, over time. To keep our interest high, we sometimes recreate the story with home made cardboard figures. A few cereal boxes, some color pencils and a bit of imagination, and a child is ready to present the story in a more dramatic way. It's history, drawing and performing arts all in one. And it is FUN!!

Here is our latest, depicting

The Myth of Ceres and Proserpine


Casting:

Ceres & Proserpine


Pluto, the king of the Underworld


Jupiter himself, in his palace....


Thursday, April 17, 2014

Easter Eggs


This week we have decided to explore the wonderful tradition of Easter Eggs and its rich symbolism and history.


Eggs, in general, were a traditional symbol of fertility, and rebirth. But in Christianity they assume a deeper meaning: they symbolize the empty tomb of Jesus:  though an egg appears to be like the stone of a tomb, a bird hatches from it with life; similarly, the Easter egg, for Christians, is a reminder that Jesus rose from the grave, and that those who believe will also experience eternal life. Eggs, while being dormant, contain a new life sealed within them, becoming a wonderful symbol of the Resurrection.

The Easter egg tradition may also have merged into the celebration of the end of the privations of Lent in the West. Historically, it was traditional to use up all of the household's eggs before Lent began. Eggs were originally forbidden during Lent as well as on other traditional fast days in Western Christianity (this tradition still continues among the Eastern Christian Churches).

One would have been forced to hard boil the eggs that the chickens produced so as not to waste food, and many traditional Easter dishes bear witness to that, having egg as the main ingredient.
  
Decorating and gifting (empty) eggs is an old tradition, particularly in Bulgaria, Poland, Romania, Russia, Ukraine, and other Central European countries.

Here are some examples:


So, after learning about them, we made our own. First, I followed the instructions on this video to empty the eggs. My children were absolutely fascinated by the process… 


After that we viewed many examples of this art on the Internet, you can use this gallery for reference. 

We discussed how each look like, the differences among them, and picked our favourites.

Then, with the help of sharpies, small icon pictures from a catalog, and some acrylic paint, we all made our own.  


We finished them with a thin coat of school glue and when they were dried I made a base for them to stand on. 

I used a penny and attached it to the egg with a small ball of modelling clay (approximately the size of a garbanzo bean) by gently squeezing them together. When the clay dried I painted it gold. 

You can also use a generous amount of glue applied with a glue gun to attach the coin.


Have a Blessed Easter!

Friday, February 8, 2013

Living books


One of the main tools used in Charlotte Manson’s educational approach, ‘Living books’, have always been very attractive to me. These books, unlike normal text books, are texts written in first person form by a single author with a lot of passion about the subject written.

Living books are engaging to read as well as understandable and interesting.

I have been working to make some of these books more accessible, in particular the ones that retell classic works of literature, together with the ones that  help understand a particular historical period either by fictional narrations or by biographies of actual historical figures.

Some of these beautifully written books are almost 100 years old, but have lost none of their charm, and the beauty of the language is hard to find elsewhere, at least as far as children's literature is concerned.

The idea of using living books that retell a classic is really a very fruitful one: you get the benefit of a well written, engaging book paired with the introduction to works of literature that have formed the backbone of our civilization. The children grasp the main plot and the characters, and thus the ground is prepared for a later time when the classical work is to be read in its entire form.

As a secondary benefit, children are exposed to a richness of lexicon and variety of sentence structure that highly benefits their literacy, their cultural background and their vocabulary and expression.

Here are the links I have adapted to the Kindle format, with the added value of artwork from well know artist which have depicted the stories throughout the ages, thus incorporating some art study to the main literature and history line.

HISTORICAL FICTION


 LITERARY CLASSICS


BIOGRAPHIES


I hope to publish many more, so I'll keep you posted.


NOTE:  If you do not own a Kindle, you can read these books in your computer. 


Wednesday, December 26, 2012

A star is born


Constellations are always such a wonderful theme, since it combines Earth and Space Science with mythology and imagination!! If we add to it a bit of art and a bit of music, then it is an awesome theme for integrating different bits and pieces of knowledge and experiences into a beautiful whole.


We started out with some basic printables of the traditional constellations from this website. It also has a free printable with a short explanation of the history behind the main constellations.

Art, History and Science:
We also made some constellation cards:
After studying them for a while, we made our own constellation cards. 

All you need is 3 by 5” white cards, and 2 ½” by 4 1/2 “ blue construction paper rectangles.

Pick a constellation. 

Mark with a pencil in the blue paper where the stars would be. With a puncher, punch out the blue paper in the places marked, and glue onto the white cards. You may trace the lines joining the starts with a white pencil. Prepare labels if desired.

Drawing your favorite constellation story.
Together with your child (children) draw your favorite story. You can incorporate some writing into it.

Music and history:
Listen together to “Constellations” by Jonathan Peters (more about it in this site).

Friday, December 7, 2012

Blank maps

This website has tons of blank maps, which are a wonderful tool for history/geography/biblical lessons!! I have been using it a lot with our "Story of the world" curriculum.

Blank maps from around the world: (http://d-maps.com)


Wednesday, September 12, 2012

Paper paper paper

Many Montessori materials, at least here in the US, include 3D realistic depictions of objects of interest going from famous buildings and landmarks to means of transport to wildlife. It is a bit challenging (not to mention expensive or prohibitive) to reproduce that at home, but I have found this website has a nice alternative: print your own 3D (scaled!) models and build them at home. All you need is a color printer, some paper and a pair of scissors and glue. OK, and lots of patience, but it is really a great project to "illustrate" any lesson.

Here is the link: 3D paper models

Check out some examples:


We are currently working on this one:


Wednesday, August 22, 2012

Enjoying the Summer vacations everyone? We have decided to homeschool all year around, but with a little slower pace on the Summer months. So things have been slow but interesting, especially with a "field trip" to Alaska... :)

But today I am sharing this great link to a wonderful website which helps complement out history curriculum. We are using "Story of the World" and many history books and living books, but sometimes pictures (and videos and interactive content) really say more than many many words :) Being able to explore the Big Pyramid with real pictures was a very interesting experience.


Hope you enjoy! I have to say that being a history buff myself, I never get tired of the subject, but I feel sometimes short videos like this help children to have a better idea of what we are talking about.


Monday, March 26, 2012

A bit of art

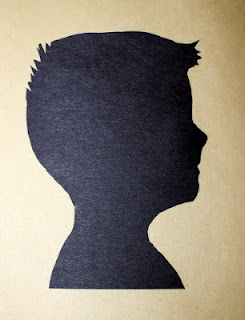
Ok, it was that time on a rainy afternoon that you definitely NEED something to do. So we decided to start our "silhouette" project.


I started by giving a general explanation of the history of silhouette. Then we proceed with our version of this project, from Older and Wisor. I modify it to be a 4 minute version :) I followed all the steps, but instead of painting the silhouette black, I used black construction paper.
I taped the print directly on the paper and cut the silhouette directly. Instant gratification, almost :). But the children had a ball seeing their profiles and being able to instantly recognized themselves.

Tuesday, March 6, 2012

Writing in Ancient Egypt


For our second lesson in the history of writing, we focus on Egypt. First we made some natural dyes using only plant material.(These dyes can be used for other historical periods- even for prehistoric art)


These are the materials used:

Hot pink: Red rose petals
Green: Spinach (is a brownish green)
Yellow: Curry powder

The process is similar for all of them:

Collect the material, chop it fine (if needed), place in a saucepan and put enough water just to cover it. Boil for 15 min, then simmer until liquid has reduced to half. Strain.

For the other three colors we used black beans.

Lilac: Place half a cup of black beans in a bowl, and put enough water to cover them by an inch. Let it sit all night. That’s it.

Purple: Use the same process as in the lilac color, but add white vinegar to it. Reduce to half.

Dark Brown: Cook the beans in some water. Strain.


We also made our own “papyrus” paper, by cutting strips of construction paper and waving them. We use school glue generously all over it, to obtain a single sheet.


After it was dry, we wrote my son’s name in hieroglyphs. This site has a very neat “translator” where you can input any name and it will give you the “equivalent”. 


As a side project, we dyed some cotton yarn, to explore how the ancients may have "put some color" into their clothes. We got this sample page, that helps us documenting our hard work :)

It was a very interesting, hands on project!
Thursday, March 1, 2012

The history of writing


This is our first activity in the series “the history of writing”. We are following along the history units of the history of civilization, focusing on a “hands on” approach to the subject of handwriting, as emphasized in Maria Montessori’s “Five great Lessons”.

In this particular activity we replicate “cuneiform writing” developed by the Sumerians around the 30th century BC.

These are the materials we used


-          A wooden dowel, one end shaped as a wedge
-          A print of the cuneiform alphabet
-          A package of crayola magic model sculpey (any type of modeling clay would work)
- A small cutting board
-          A tray to contain all the materials.

After a brief introduction and explanation, we explore together the cuneiform signs, noting that they are basically composed of two shapes repeated and combined so as to form all the letters needed for their language.

After practicing this two shapes on the clay, we smooth it again and my DS suggested trying to write his on name on it. 


We left it to air dry and continue discussing how the storage of these tables would have been. We ended the activity by watching some pictures of actual tablets. (found here)